
How to Configure Carestream to Send Exams to the PACS Server
Learn how to configure the Carestream Image Suite software to connect and send exams directly to the UniRadio cloud PACS server.
Prerequisites
Before you begin, you will need the following information from your UniRadio PACS server:
- Server IP address
- SSCP Port
- AE Title
Where to find this information?
Go to PACS Server Settings on the UniRadio platform and enable the PACS Port to view the connection details.
Part 1: Register the PACS Server in Carestream
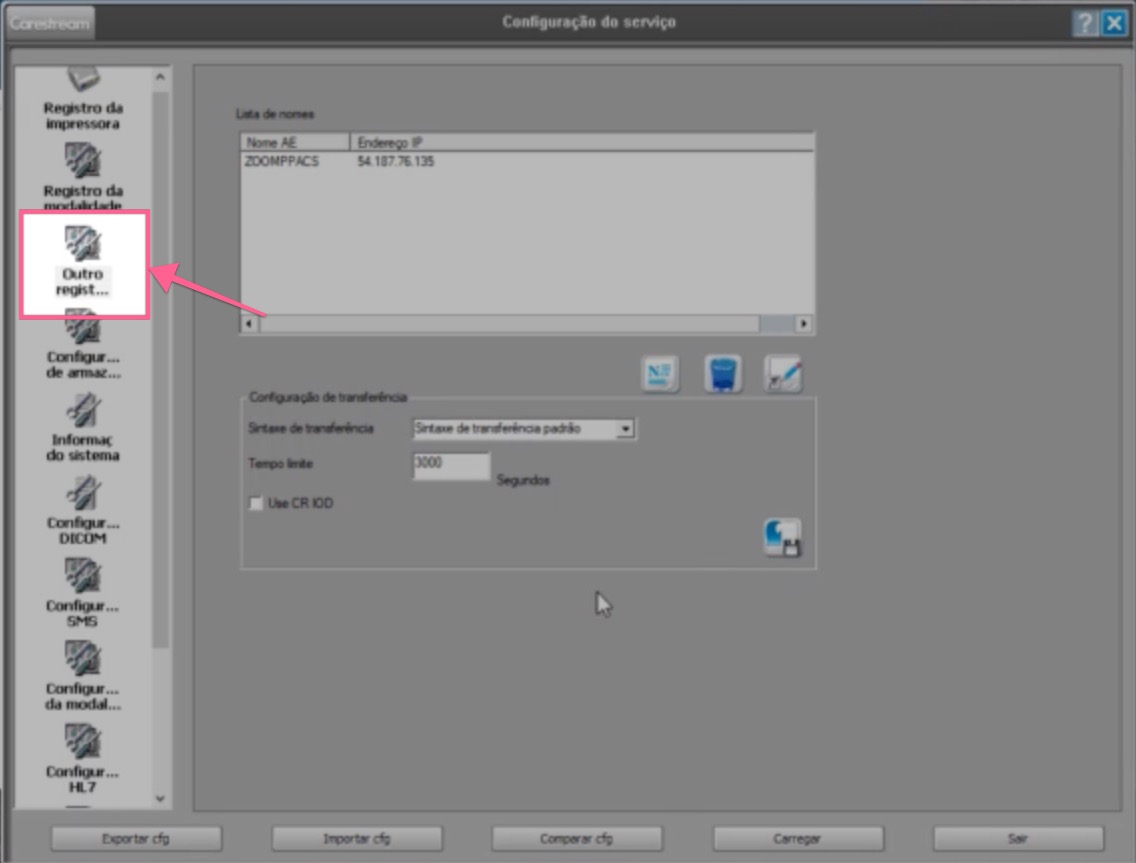
1. Open Service Configuration
Open Carestream Image Suite and access Service Configuration. In the left sidebar, click "Other reg..." to manage registered PACS destinations.
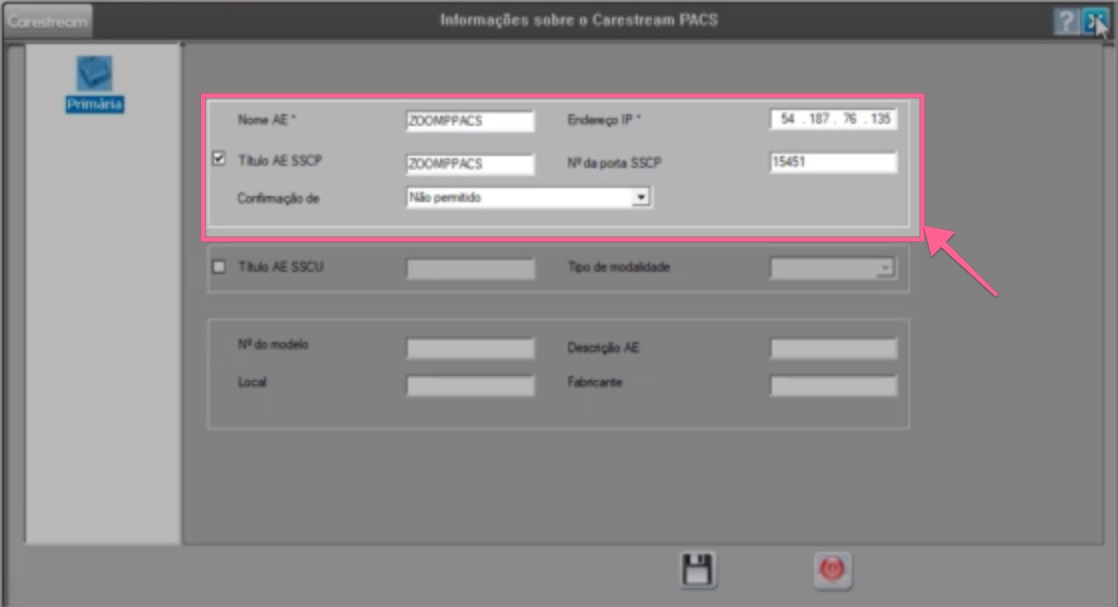
2. Fill in the PACS server information
In the "Carestream PACS Information" screen, fill in the fields using the information provided by UniRadio:
- AE Name — enter the server AE Title (e.g.
UNIRADIOAPP) - IP Address — enter the PACS server IP
- SSCP AE Title — check the box and enter the same AE Title
- SSCP Port No. — enter the provided port (e.g.
15451) - Confirm from — keep as
Not permitted
Where to find this information?
Go to PACS Server Settings on the UniRadio platform and enable the PACS Port to view the connection details.
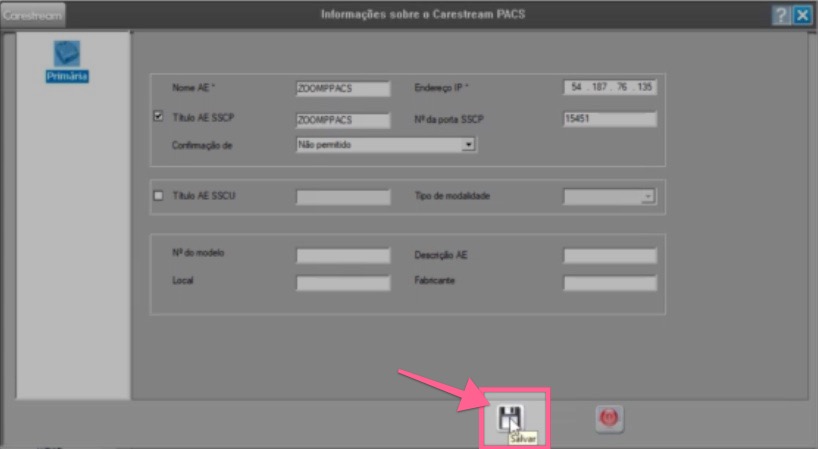
3. Save the registration
Click the Save button (floppy disk icon) at the bottom of the window to confirm the server registration.
Part 2: Configure the Transfer Settings
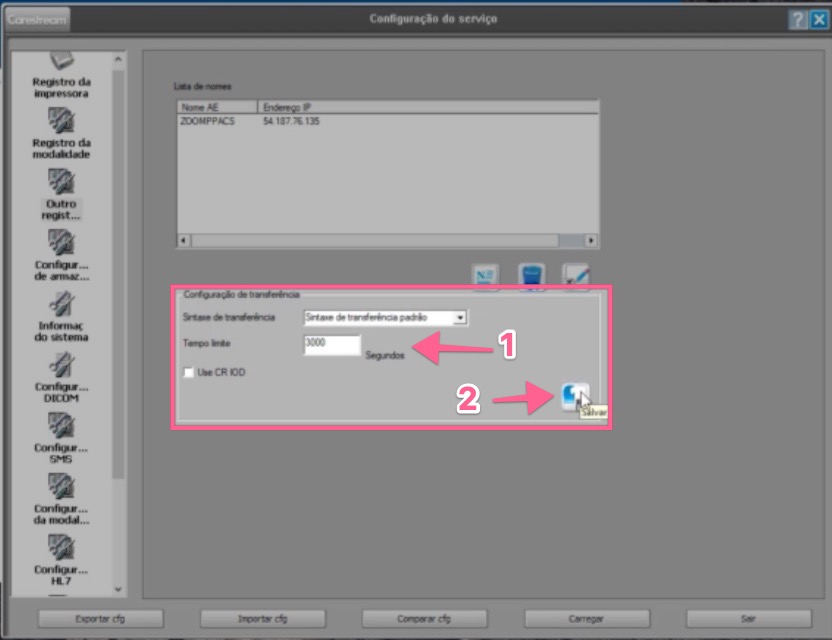
4. Set the timeout and save
Back on the "Service Configuration" screen, in the "Transfer Configuration" section:
- Verify that the Timeout is set to
3000seconds - Click the Save button (floppy disk icon) to save the transfer settings
5. Load the settings
Click the "Load" button on the bottom bar of the window to apply all configurations.

Part 3: Send an Exam to the PACS
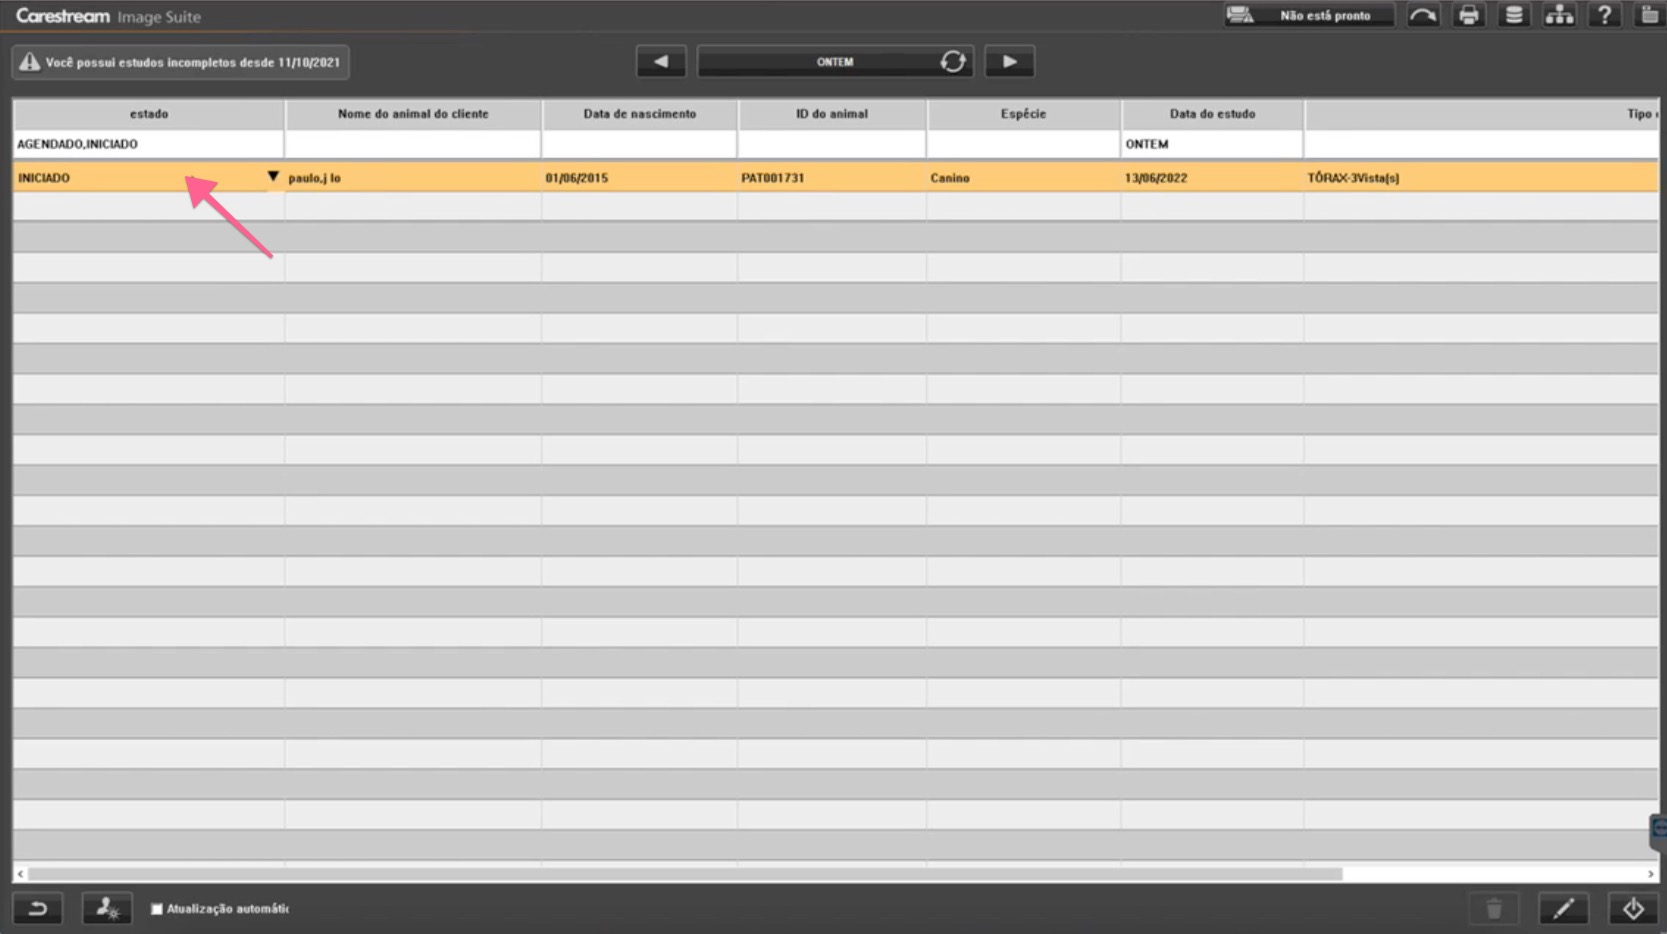
6. Select the exam from the study list
On the Carestream Image Suite main screen, find the exam you want to send in the study list and click on it to select it.
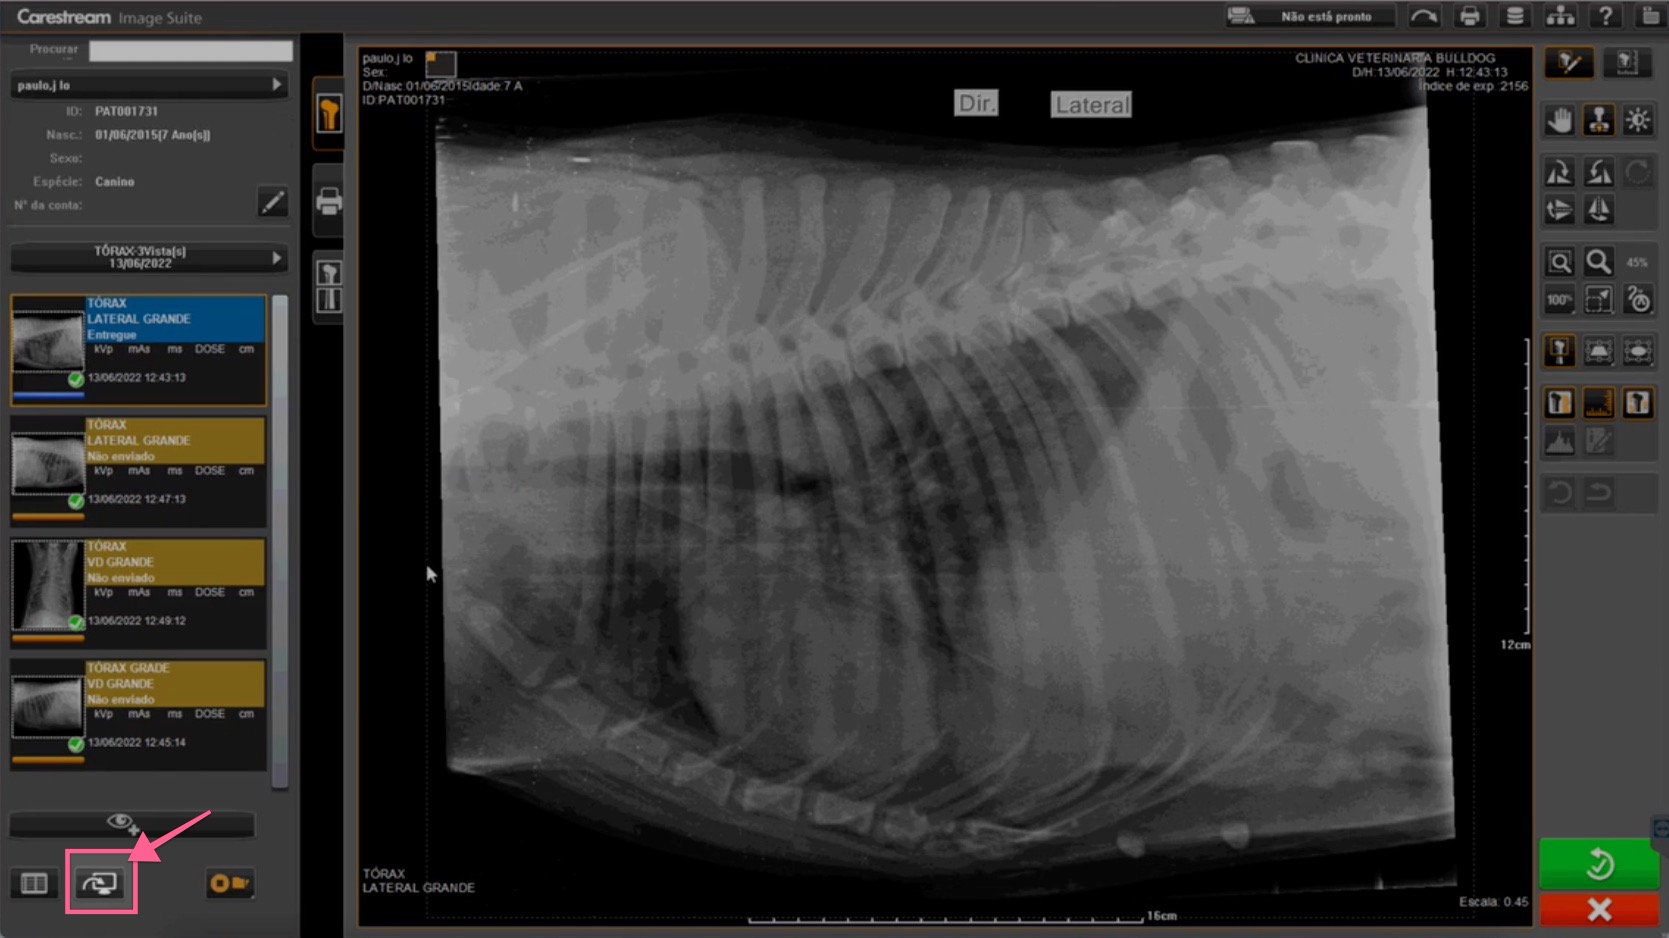
7. Open the image viewer and access the export option
With the exam open in the image viewer, click the export/send icon (server icon) in the lower-left toolbar.
8. Export the study to the PACS
In the "Export Study" window:
- Select the images you want to send (or check "Select all")
- In the destination list, check the ZOOMPPACS server
- Click the send button (power icon) to start the transfer

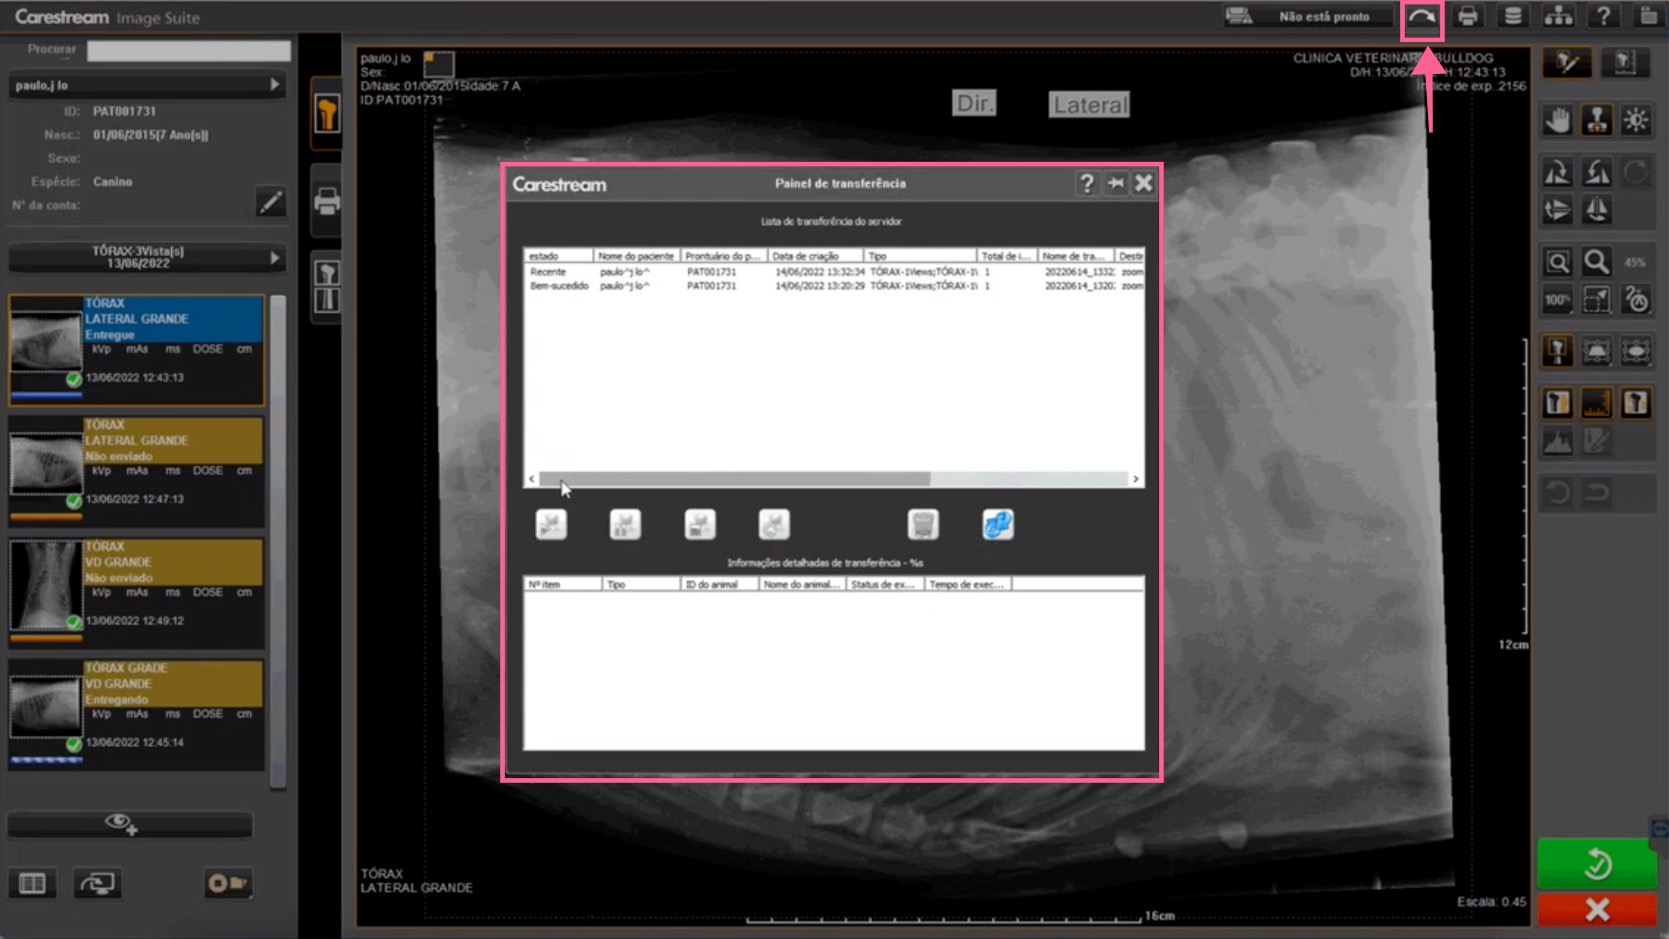
9. Monitor the transfer status
The Transfer Panel will open automatically, showing the progress and status of each send. When the status shows "Successful", the exam has been successfully sent to the PACS server.
Need Help?
Check our FAQ or contact support if you run into issues configuring or sending exams through Carestream.