
How to Configure Voyance to Send Exams to the PACS Server
Learn how to configure the Voyance software to connect and send exams directly to the UniRadio cloud PACS server.
Prerequisites
Before you begin, you will need the following information from your UniRadio PACS server:
- AE Title
- Server IP address
- Port
Where to find this information?
Go to PACS Server Settings on the UniRadio platform and enable the PACS Port to view the connection details.
Part 1: Register the PACS Server in Voyance
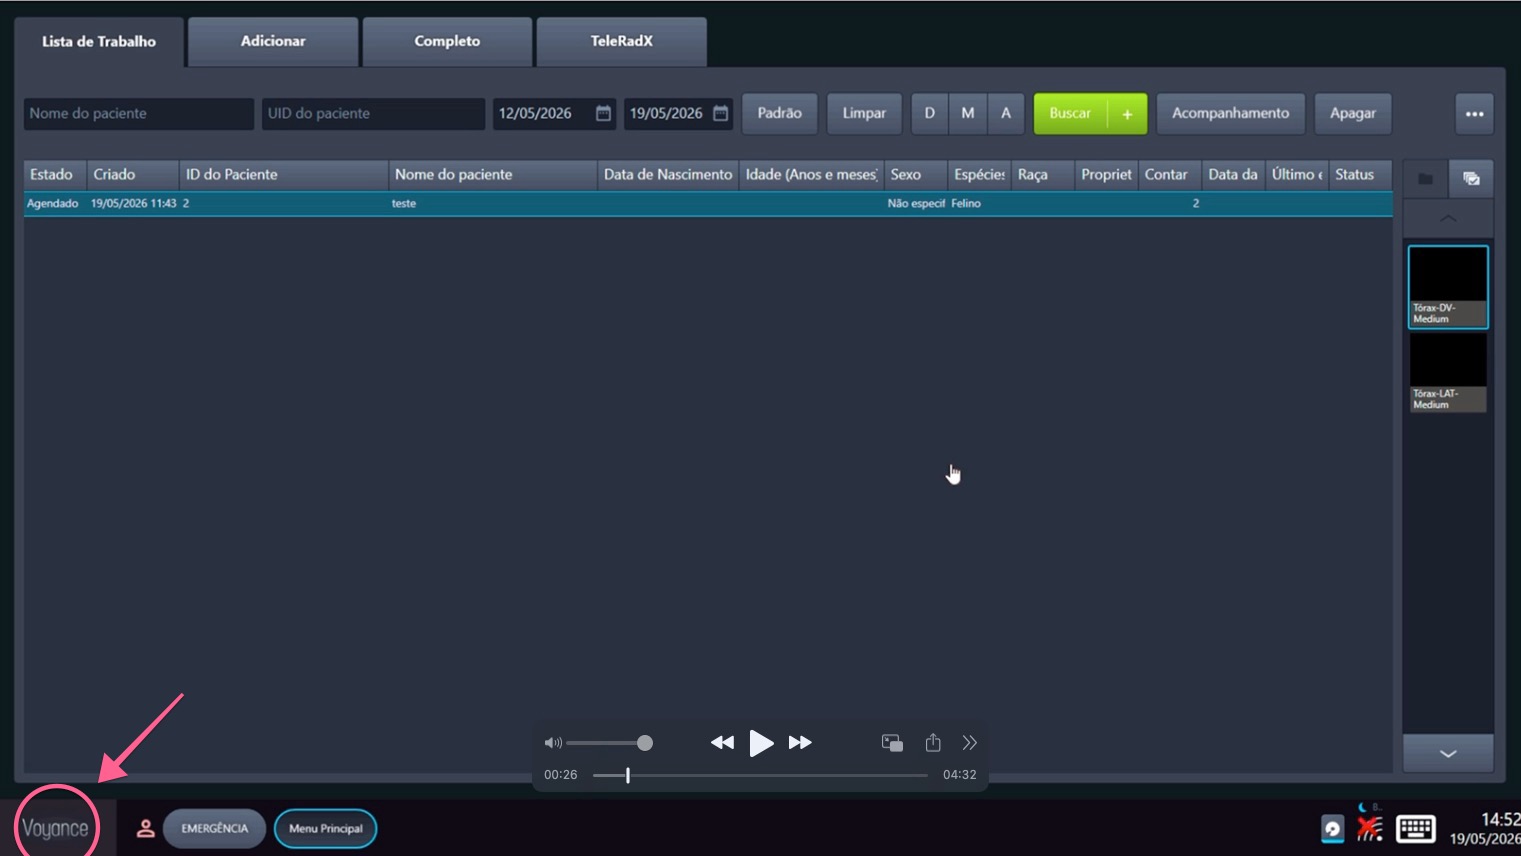
1. Open the Main Menu
On the Voyance main screen, click the "Menu Principal" button in the bottom bar to open the options menu.
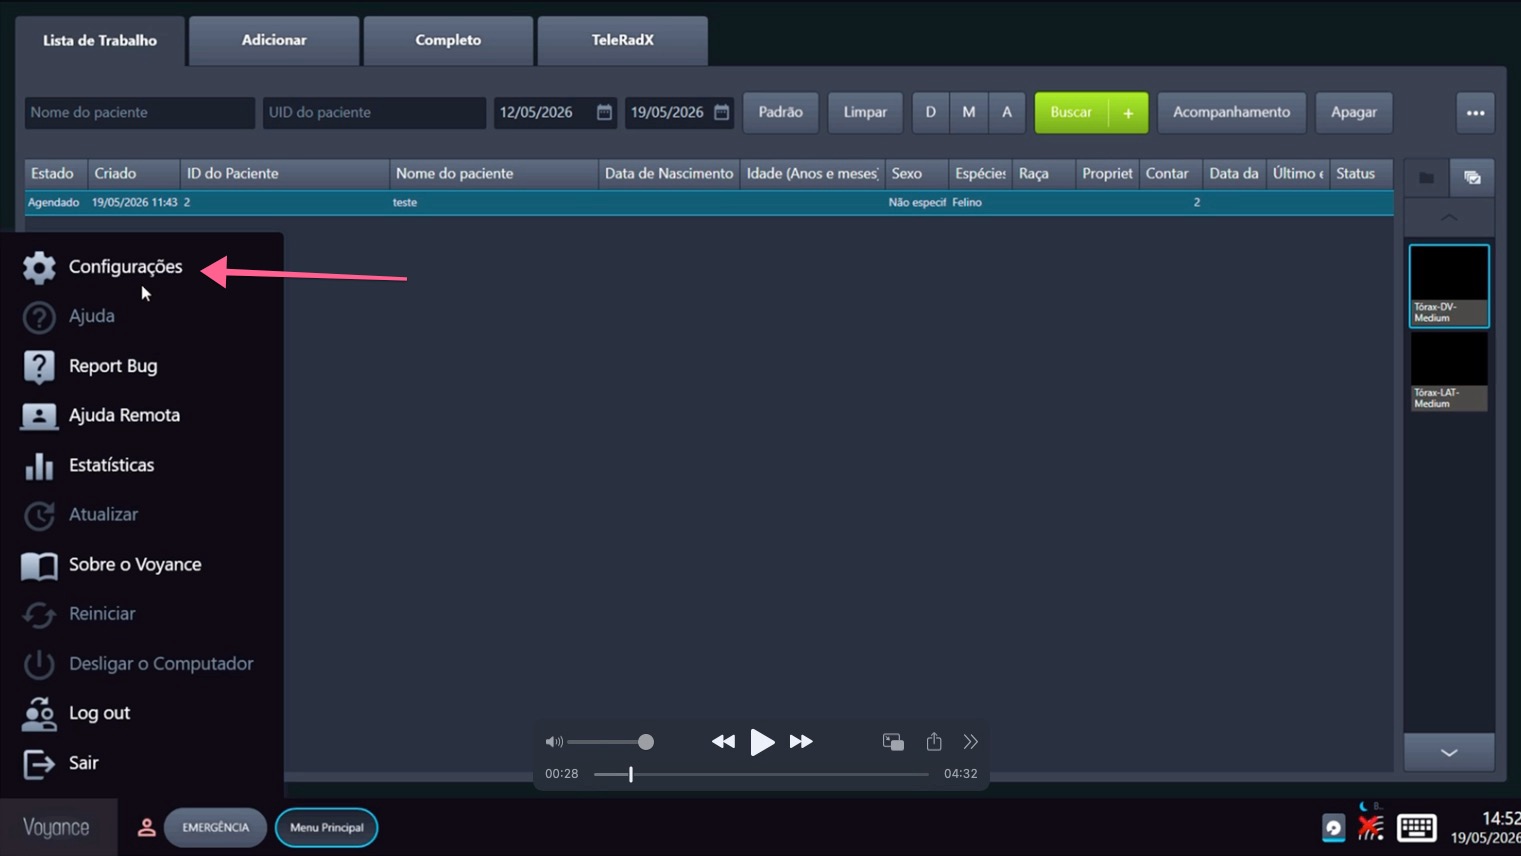
2. Open Settings
In the side menu that opens, click "Configurações" to access the system settings.
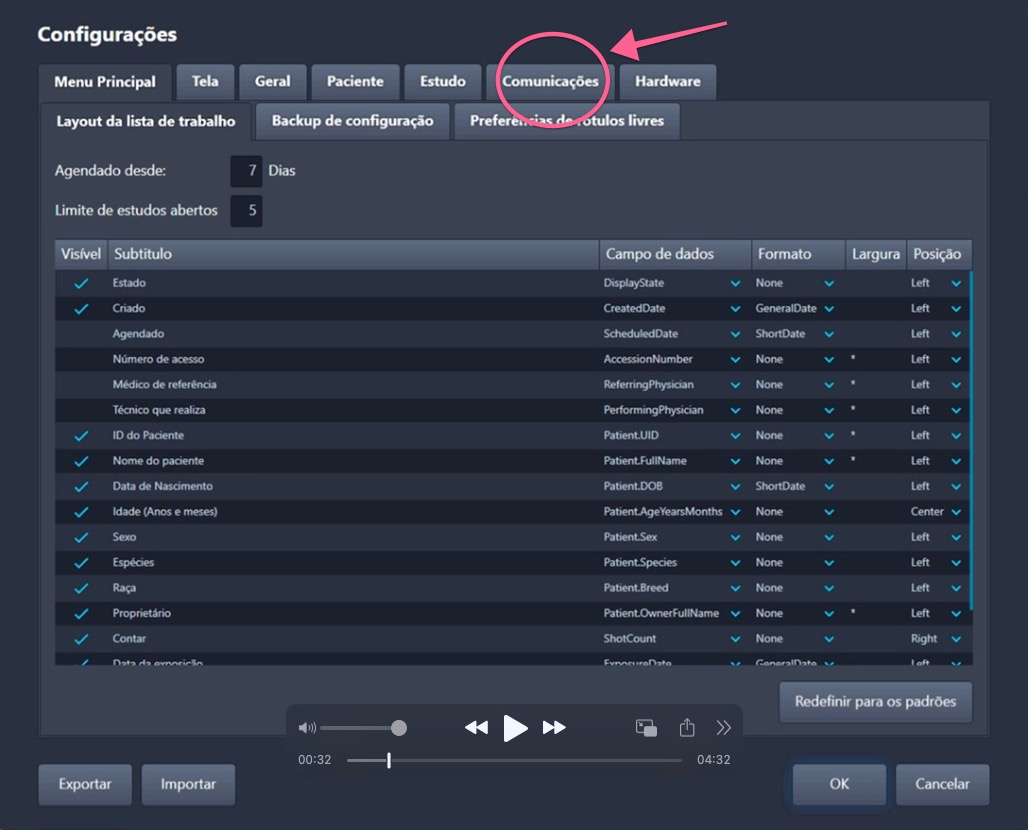
3. Go to the Communications tab
In the Settings window, click the "Comunicações" tab to access the DICOM integration options.
4. Navigate to Remote Nodes
Inside Comunicações, make sure you are in the DICOM section and click the "Nós remotos" tab to manage destination PACS servers.
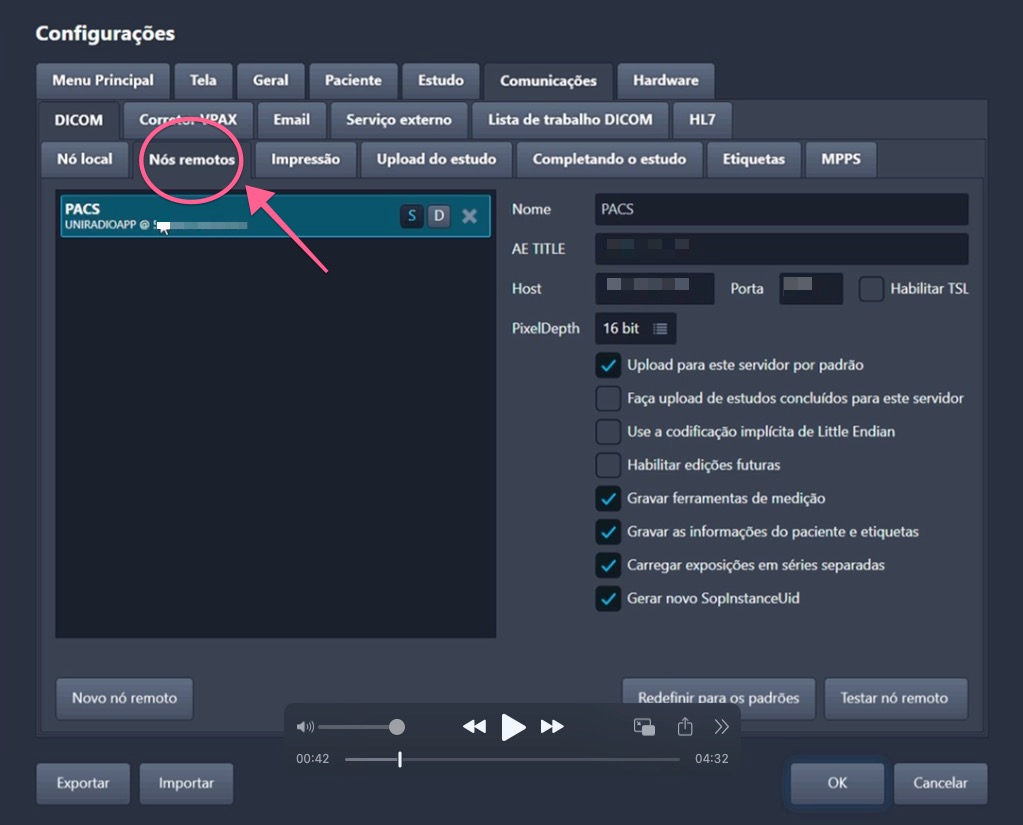
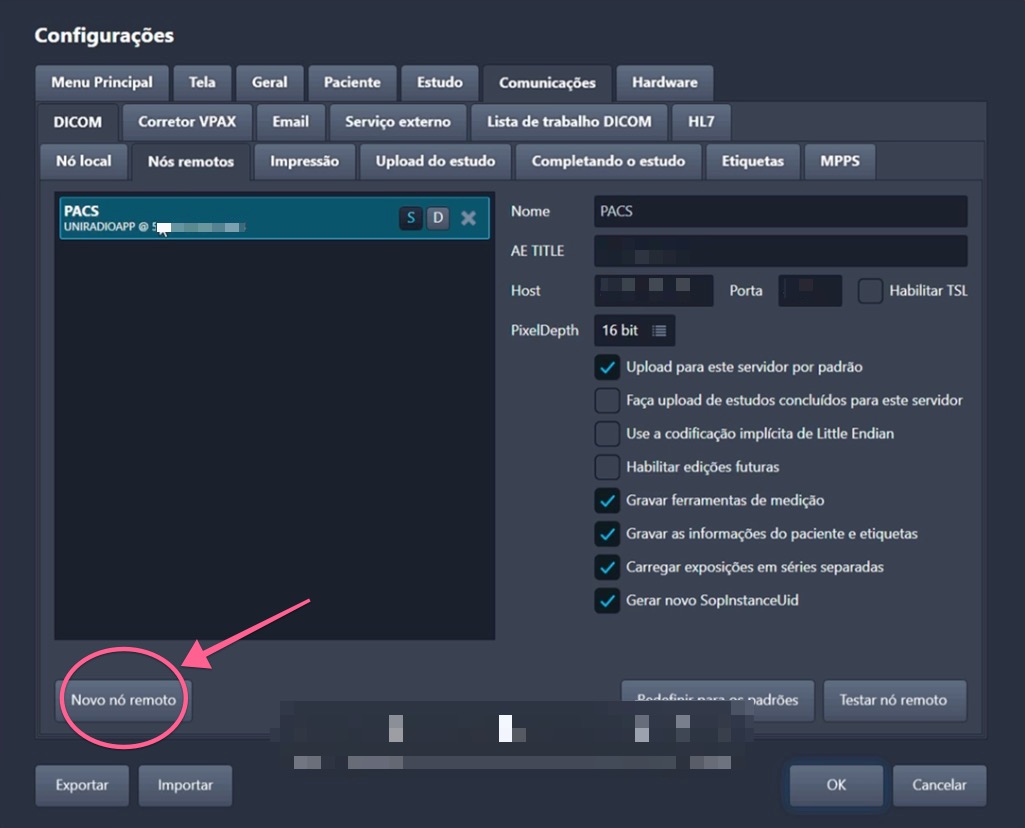
5. Add a new remote node
Click the "Novo nó remoto" button at the bottom of the screen to create a new PACS server entry.
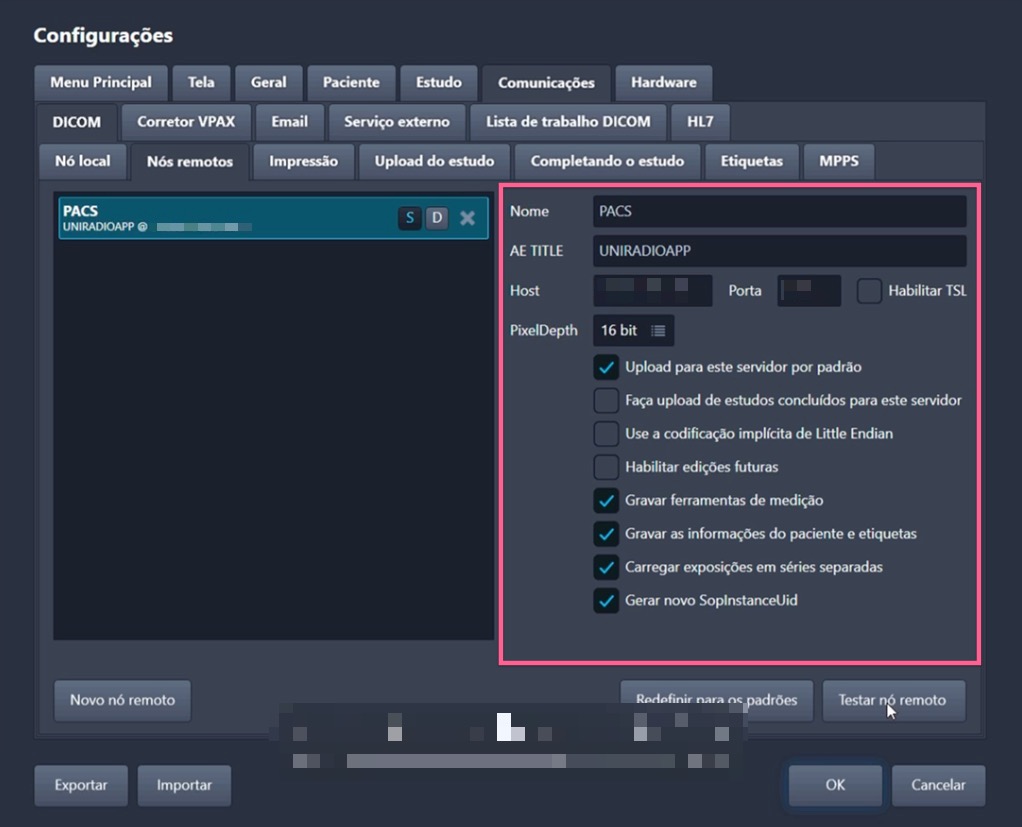
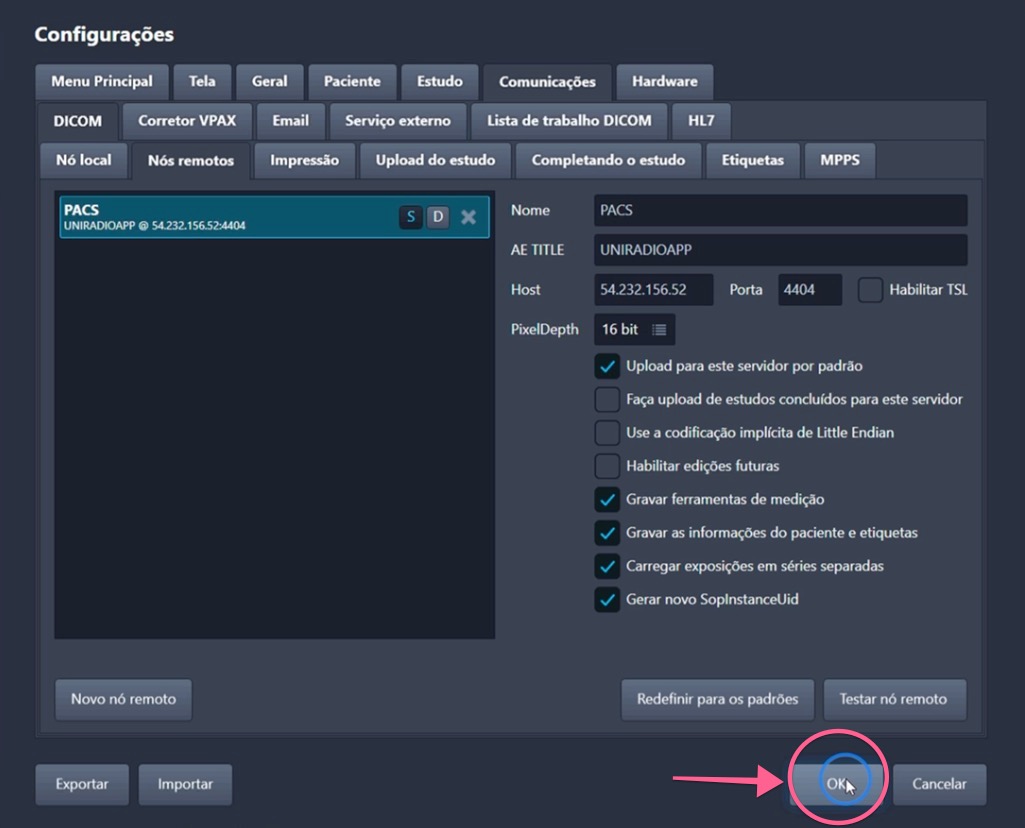
6. Fill in the connection details
In the right panel, fill in the fields with the information provided by UniRadio:
- Nome — an identifying name (e.g.
PACS) - AE TITLE — enter the server AE Title (e.g.
UNIRADIOAPP) - Host — enter the server IP address
- Porta — enter the server port
Where to find this information?
Go to PACS Server Settings on the UniRadio platform and enable the PACS Port to view the connection details.
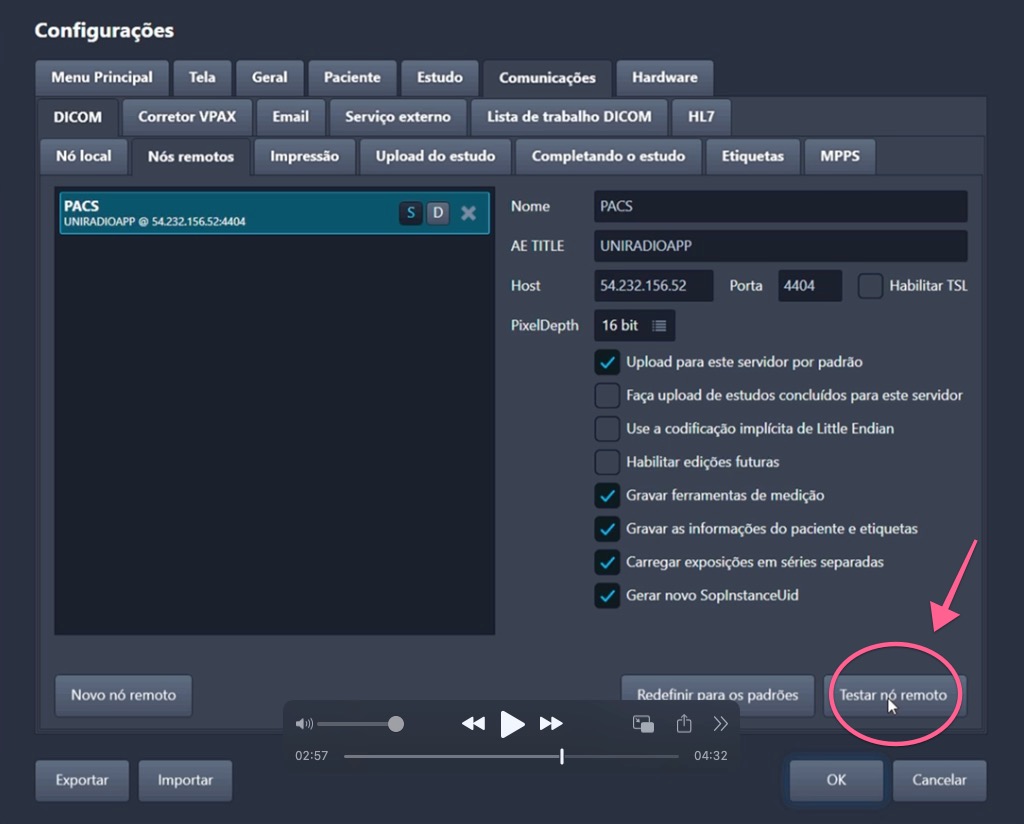
7. Test the connection
With the details filled in, click "Testar nó remoto" to verify that the connection to the PACS server is working correctly.
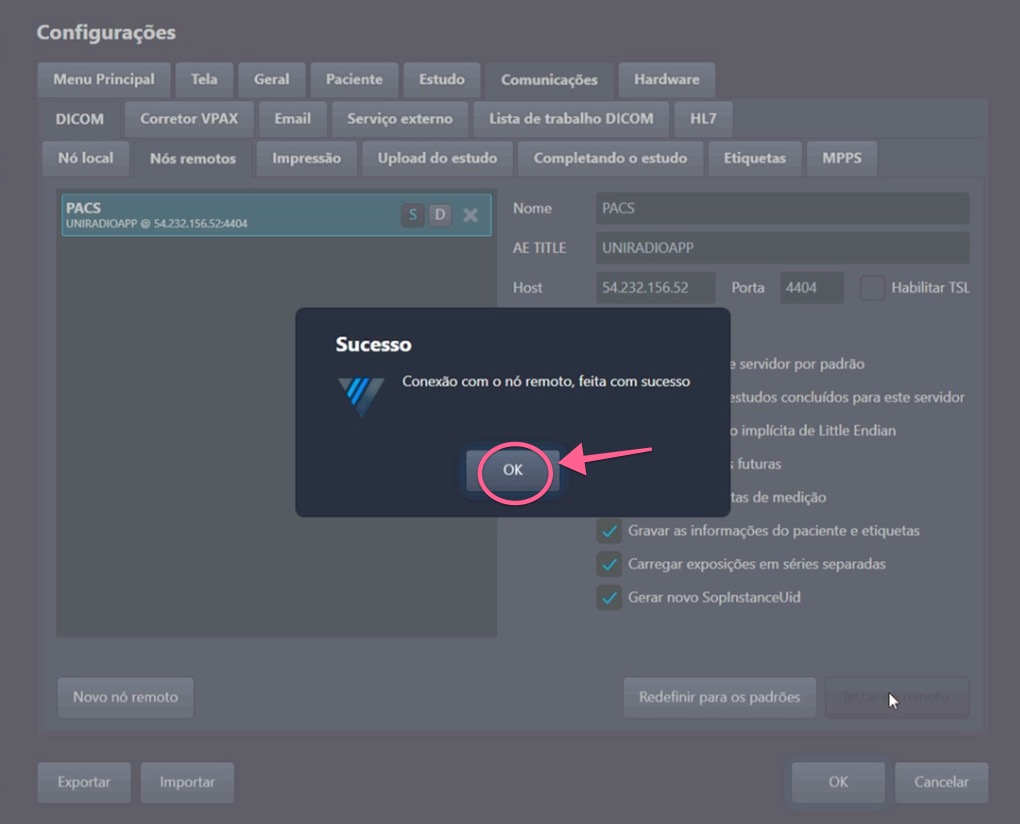
8. Confirm connection success
If the connection is established correctly, a "Sucesso" dialog will appear: "Conexão com o nó remoto, feita com sucesso". Click "OK" to close the dialog.
9. Save the settings
Click "OK" in the bottom right corner of the Settings window to save and close.
Part 2: Send an Exam to the PACS
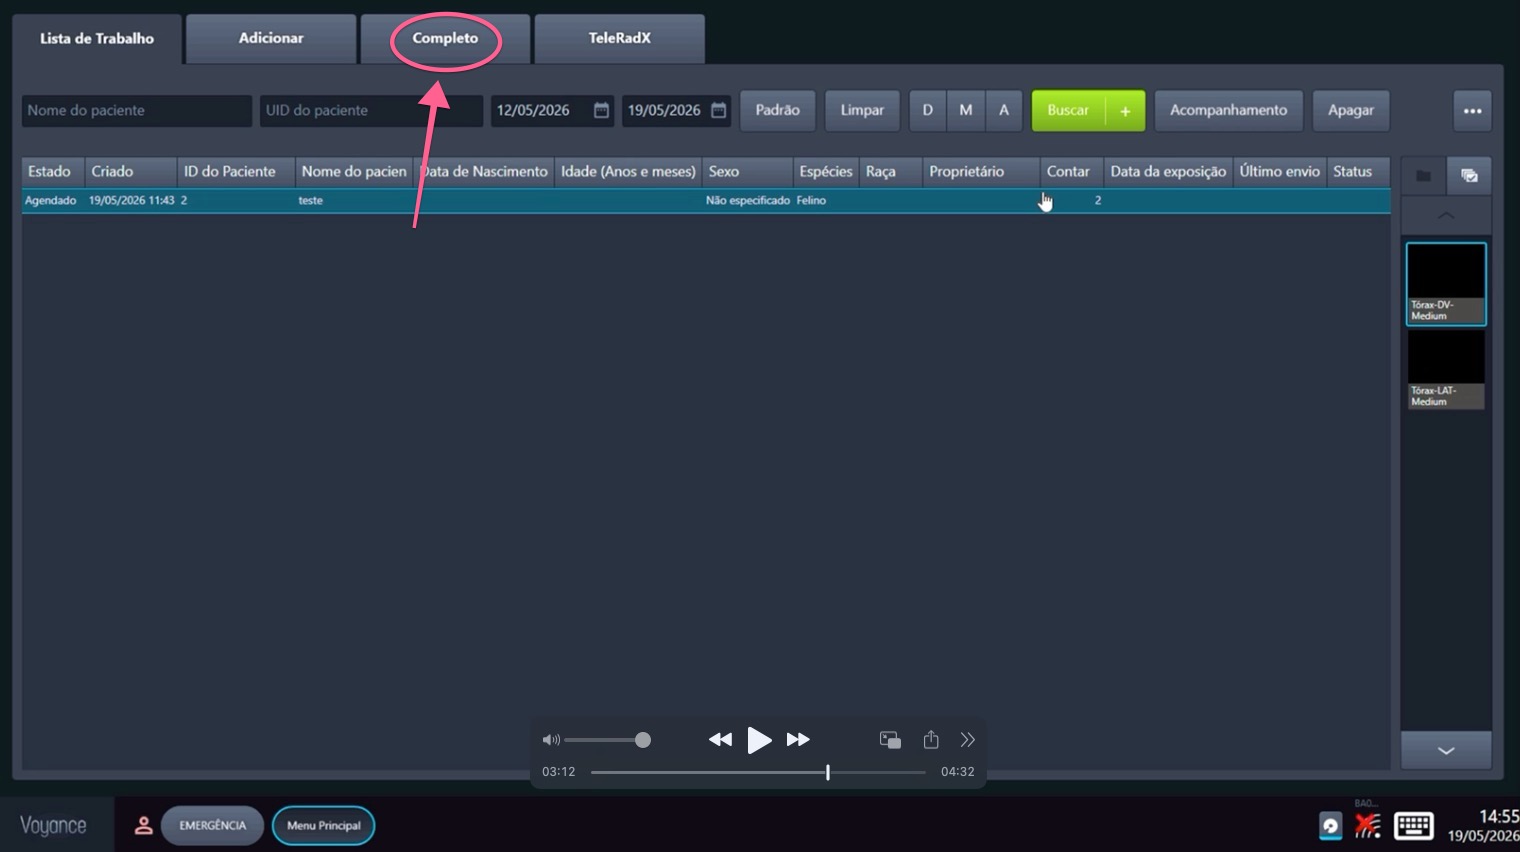
10. Open the Completed tab
On the Voyance main screen, click the "Completo" tab in the top bar to view exams that have been finalized and are ready to be sent.
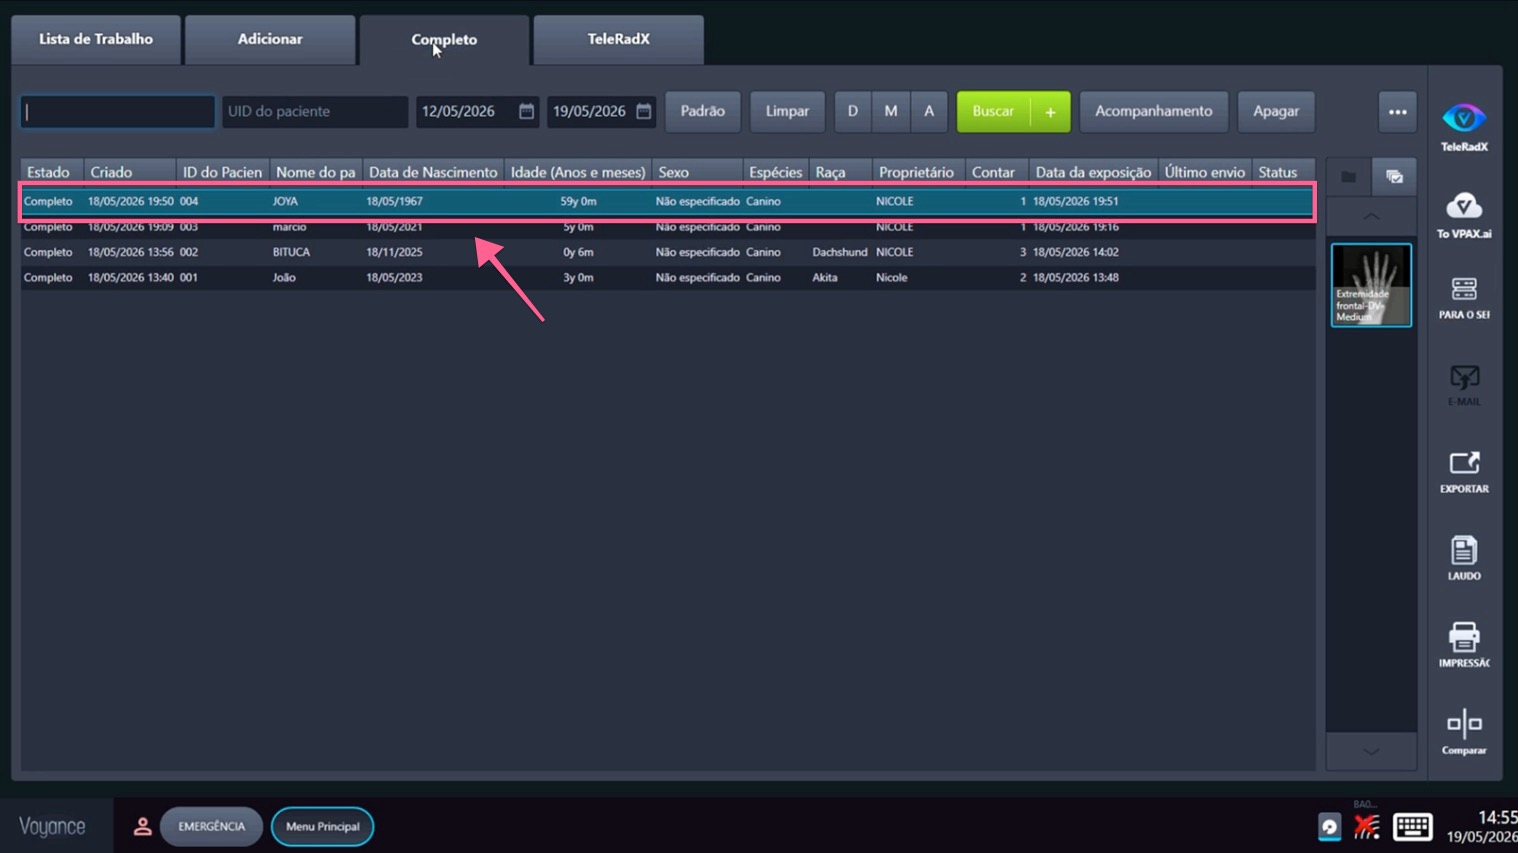
11. Select the exam
In the completed exams list, click the exam you want to send to the PACS server to select it.
12. Click Send to Server
With the exam selected, click the "PARA O SERVIDOR" button in the right side panel to start uploading the images to the UniRadio PACS server.
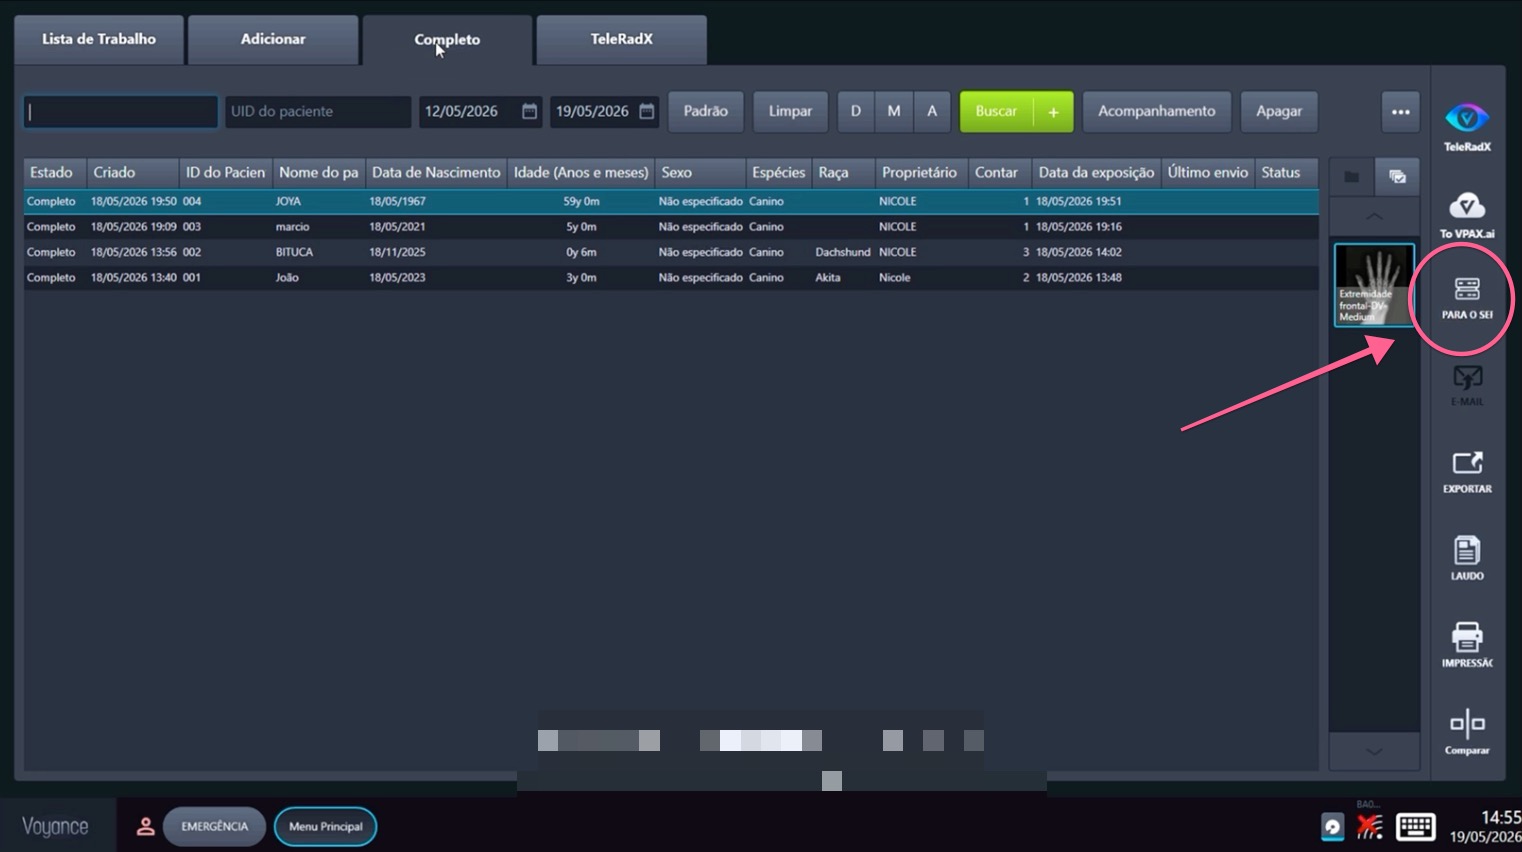
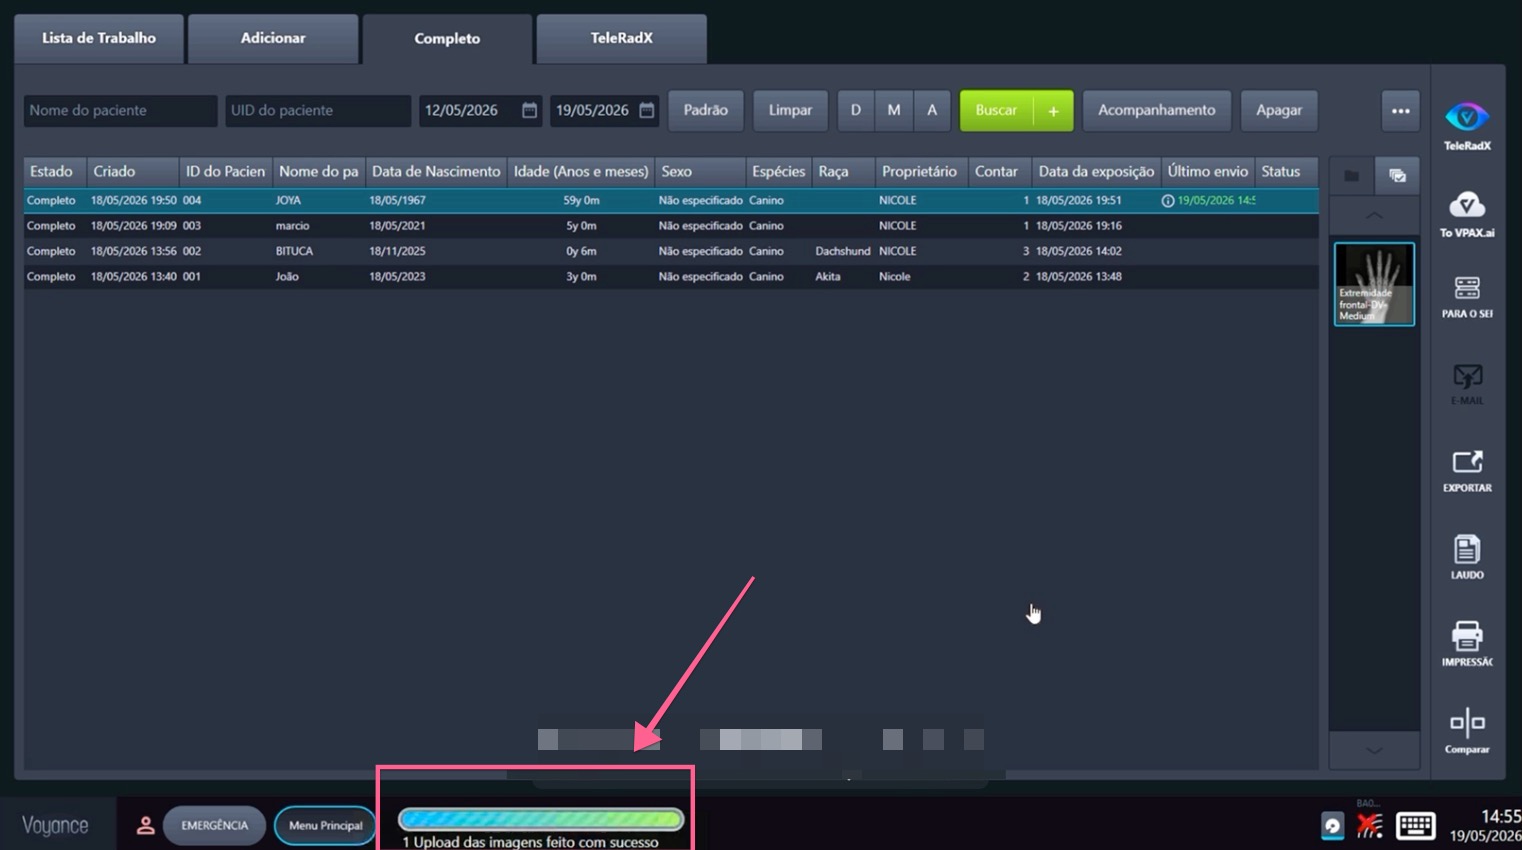
13. Wait for confirmation
The upload progress will be shown in the bottom bar. Once complete, the message "Upload das imagens feito com sucesso" will confirm the exam was sent. It will be available on the UniRadio platform for reporting shortly.
Need Help?
Check our FAQ or contact support if you run into issues configuring or sending exams through Voyance.